Wow, that’s hard to summarise in a SEO friendly blog title. Try to make a fitting title for an initial project setup, I dare you! For me, making up a title that covers it all was probably the hardest thing of this article. 😉
Anyway, this article covers my way of installing WordPress and deploying it to a webserver. In the far past I usually had a cheap hosting service without SSH access, downloaded WordPress to unzip it and uploaded it to a server using FTP.
At this point, developers with some actual good working experience should probably laugh their pants off for such a noobism. No hard feelings there mate, I slammed my head against the wall numerous times also for doing this in an ancient way.
So, how did I do this now?
Dependency management
Before we start, I would like to motivate you to always use a dependency manager. For PHP applications you can do this very easy with Composer. There are plenty of articles around with information about Composer, how it works or how to install. A very plain reason for me is a clear distinction between code you use from others in your project and your own code.
Installing WordPress
I went for Root.io’s Bedrock bootstrap of WordPress. Basically, it’s just WordPress but moulded in a different form for better development experience. See links below for detailed information and their guide to install using composer, easy-peasy.
https://roots.io/docs/bedrock/master/installation/#getting-started
Setup Git repository
There are several online services providing you a way to remotely store your Git repositories, like Bitbucket, GitLab, GitHub and so on. I’m not sure about Bitbucket, but GitLab and GitHub are free to use. For the repository of this website I used GitHub, no reason in particular, I didn’t even think about it since I already had an account there.
After installing WordPress I created a private repository on GitHub and locally within the project’s root folder with
git initNow I had 2 repositories, locally and remote. So, local I added a remote with
git remote add origin https://github.com/user/repo.gitand pushed the project to the remote with
git add .
git commit -m "Install Bedrock"
git push origin master:master
and voila, the project is on GitHub.
Deploy with GitHub Actions
I purchased a domain and web hosting with SSH access for a neat price at one.com. So, now I only had to deploy the project from GitHub to this webserver using SSH. Here’s how I did that.
In GitHub go to the “Actions” tab of your project’s repository and click “set up a workflow yourself”.
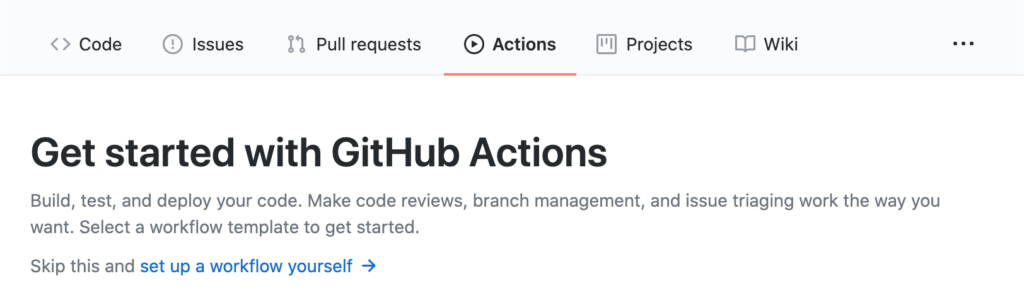
This will create a YAML file in the .github/workflows folder. The name of the file doesn’t really matter, but use something that describes your workflow action like “deploy.yml”.
This YAML automatically contains a default script to give you a quick start up. By default it will use the push and pull_request event on the master branch. The script itself by default will just be a checkout and some sample echo statements.
Currently this project is very minimal and only contains Bedrock at the moment, so I’m only interested in a simple build and deploy script. Building would just be a composer install and deploy no more than using rsync to push the code to the webserver. Later, or if I need it, I can add more like an npm install, npm run build or tests like unit, integration or even end-to-end tests. Currently the script now looks like the following.
name: Build and deploy

on:
  push:
    branches: [ master ]
  workflow_dispatch:

jobs:
  build-deploy:
    runs-on: ubuntu-latest
    steps:
      - uses: actions/checkout@v2

      - name: Install dependencies
        run: |
          composer install -o

      - name: Deploy
        env:
          dest: "${{secrets.SSH_USER}}@${{secrets.REMOTE_SERVER}}:${{secrets.REMOTE_PATH}}"
        run: |
          echo "${{secrets.DEPLOY_KEY}}" > ./.deploy_key
          chmod 600 ./.deploy_key
          rsync -chav \
            -e 'ssh -i ./.deploy_key -o StrictHostKeyChecking=no' \
            --exclude /.deploy_key \
            --exclude /.git/ \
            --exclude /.github/ \
            ./ ${{env.dest}}
Secrets and environment variables
Wait, what are those ${{secrets...}} and ${{env...}} thingies?
Well, in order to rsync code (either generated or from the repository), I need some server information and credentials to push to. I generally don’t find it convenient to place these credentials inside such a script. Let’s say I’ll switch to another hosting service. This will give me a new ssh host, credentials and keys. In my believe that’s just configuration and I wouldn’t want to change my build/deploy script in code just for configuration.
Declare configuration in variables, not in code.
In GitHub you can use “Secrets” for this. In Bitbucket it’s called “Repository variables”. But, since I’m using GitHub I’ll dive into that.
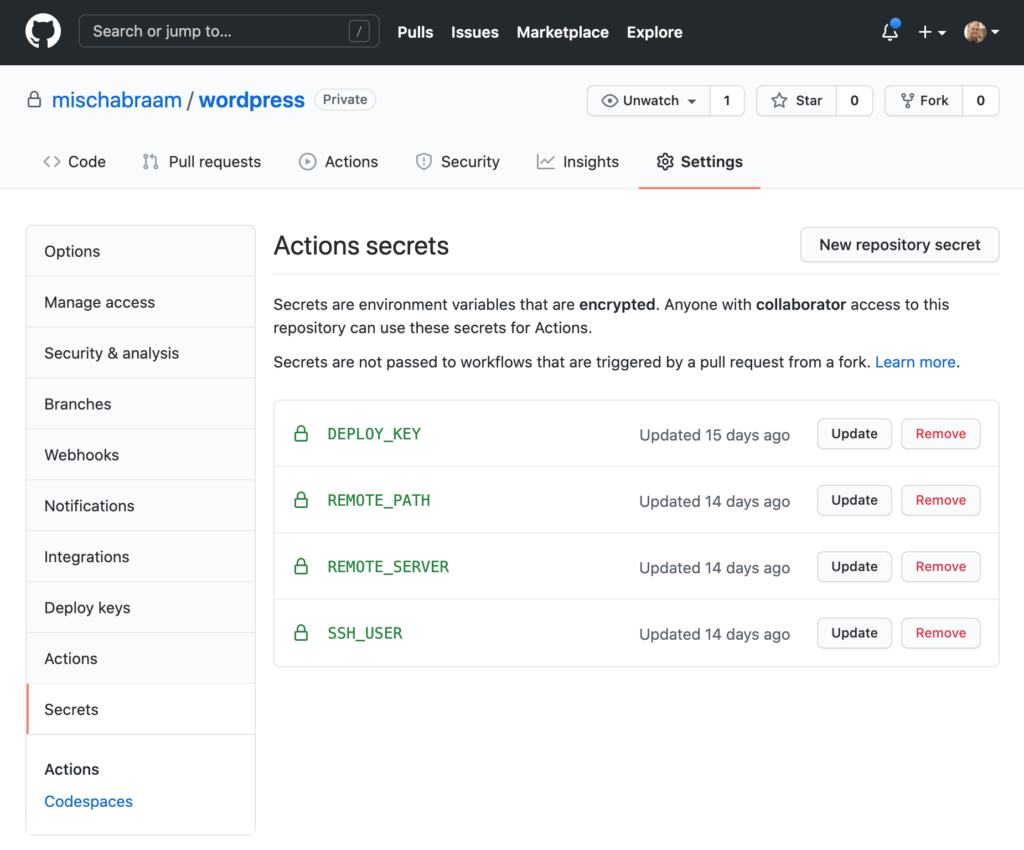
In the image above you can see I created a couple of secrets. I used those in my workflow script with
${{secrets.EXACT_NAME_OF_SECRET}}and, presto, the script now is configurable with these variables.
Inside the script itself you can see a little part like
env:
  dest: "${{secrets.SSH_USER}}@${{secrets.REMOTE_SERVER}}:${{secrets.REMOTE_PATH}}"
This, well is pretty self explanatory, will create a variable inside the script which I used simply with
${{env.dest}}And there you go; a build and deploy script in GitHub. Last thing to fix is actual rights to access the webserver from GitHub.
SSH access from GitHub to a webserver
For the rsync command to work, GitHub needs access to SSH into the webserver. Stepwise this can be done with:
- Generate a new SSH key without a passphrase (I did this on my mac, used mischabraam@github.com as email address and stored both the public and private key in my password vault),
- Add the public key to
~/.ssh/authorized_keyson the webserver, - Add the private key to a GitHub secret and use that in the workflow script. In mine this is called
DEPLOY_KEY.
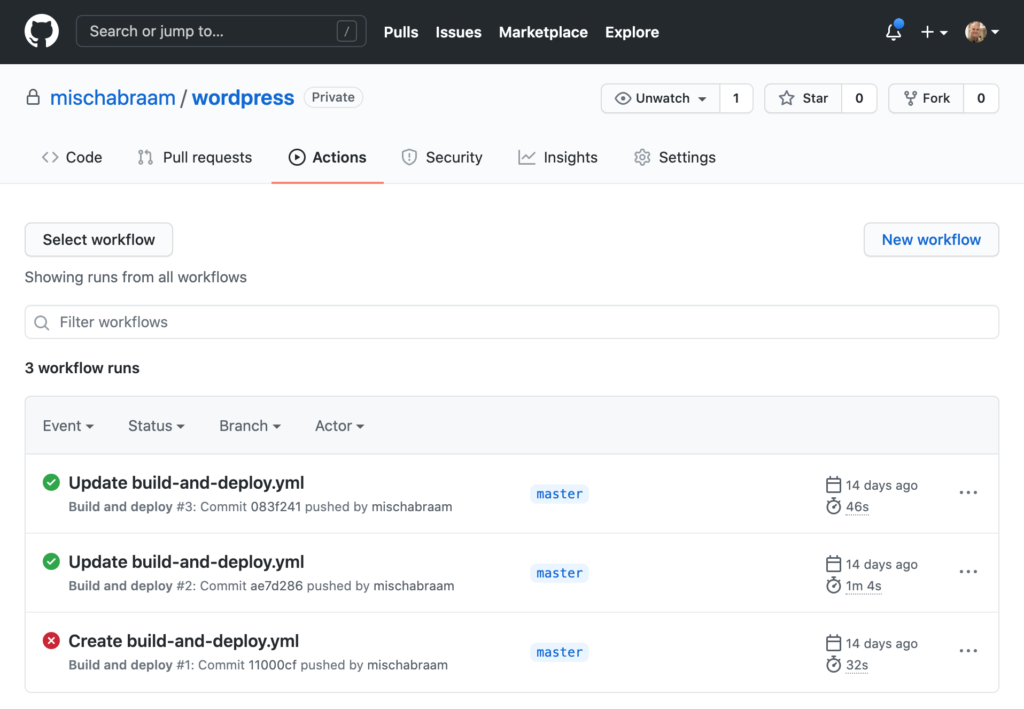
After all of this I had a working build and deploy script that triggers every time I push changes to the master branch. In GitHub you can see the workflows running and wether they fail or pass. Neat!!
Changing document root with .htaccess
As you can read on the website of Bedrock, this application doesn’t work directly from the project’s root folder, but from a sub folder named “web”. But, since I purchased a hosting plan from a service and I don’t have full access to Apache’s configuration, I couldn’t change the document root on the webserver to another path. So, I had to do this by altering the document root with the following .htaccess file.
RewriteEngine On

# Force www for domain without subdomain
RewriteCond %{HTTP_HOST} !^www\.mischabraam\.nl$ [NC]
RewriteRule ^(.*)$ https://www.mischabraam.nl/$1 [R,L]

# Force https
RewriteCond %{HTTPS} !=on
RewriteRule ^ https://%{HTTP_HOST}%{REQUEST_URI} [R,L]

# Re-set document root to "web" folder,
# since Bedrock WordPress is installed there
RewriteCond %{REQUEST_URI} !web/
RewriteRule (.*) /web/$1 [L]

# Rewrite URL's for WordPress
# Skip real files and directories
RewriteCond %{REQUEST_FILENAME} !-f
RewriteCond %{REQUEST_FILENAME} !-d
# Otherwise send it to WordPress
RewriteRule .* /index.php [NC,L]
That’s quite a story, I hope you can find something useful for your project.